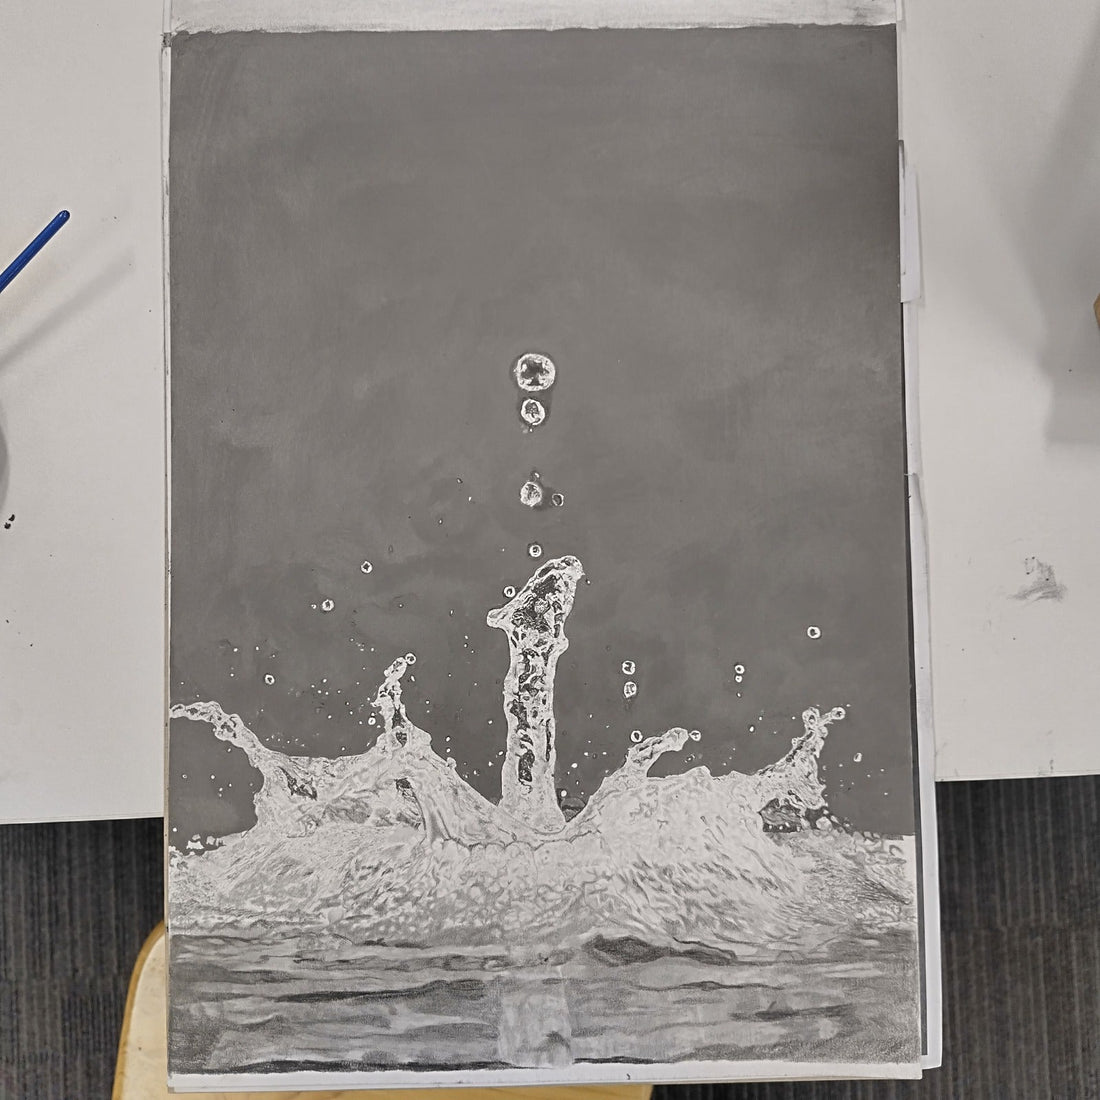
Understanding Light and Shadow: A Beginner’s Guide to Creating Depth
Share
Hi there! I’m Luke Lewis, founder of Luke’s Fine Arts – where I help passionate artists, young and old, turn their drawings into works that feel alive.
When I first began working seriously with graphite pencils, something unexpected happened. I started to see the world differently — not just shapes and outlines, but the way light curved around a cheekbone, how shadows stretched across a desk, and how the tiniest shift in tone could completely change the mood of a scene.
I remember one afternoon, sitting by my window, sketching a crumpled piece of fabric. At first, it looked flat. Lifeless. But the moment I started noticing where the light softened and where the shadows bit sharply into the folds, the drawing suddenly had weight… shape… and presence. That’s when I realised: mastering light and shadow is like unlocking the heartbeat of your art.
Have you ever looked at your work and thought, “It’s good… but something’s missing”?
Chances are, it’s not your lines. It’s not your subject.
It’s the way you’re using light and shadow.
This isn’t just “shading.” It’s about creating depth, focus, and dimension — pulling your viewer into the world you’ve drawn.
And the best part? Once you learn to control light and shadow, your art transforms instantly.
What You’ll Learn Today
By the end of this guide, you’ll understand how to:
-
Harness light to shape shadows and add depth to your art
-
Turn flat sketches into 3D drawings by using shadows for volume
-
Choose between soft and hard shadows for realistic results
-
Make your objects pop with powerful value contrast
-
Blend shadows smoothly for lifelike textures
-
Keep your light source consistent so your forms feel believable
How Light Shapes Your Art
Light changes everything. It’s not just about brightness — it’s about storytelling.
Think about this: What would your drawing feel like if the light came from below instead of above? Would your character look friendly… or a little sinister? What happens when light hits from the side — does it add mystery, or drama? And how does soft, diffused light change the emotional tone compared to harsh midday sun?
Shadows aren’t “empty space.” They are your sculpting tools. They give mood, shape, and direction to your work. They tell your viewer: This is where to look. This is how it feels.
Pro Tip #1: Before you start a drawing, place an object under different light sources and angles. Don’t draw it yet — just watch how the shadows shift and change. This simple exercise will train your eyes to see before you ever put pencil to paper.
Pro Tip #2: The most dramatic drawings often use a strong “key light” — one dominant light source that controls the mood. If you can make your shadows agree with that single light, your whole drawing will feel more cohesive and believable.
Mini Challenge: Grab a small object (a mug, an apple, or even your own hand). Place it near a lamp and take 3–4 photos with the light coming from different directions — above, below, side, and behind. Study each one. Which setup makes the object look most dramatic? Which feels calm? Which feels strange or unsettling? This will give you a deep, intuitive understanding of how light sets the mood.
When you truly see how light interacts with form, you’re no longer just copying a subject — you’re controlling how your audience experiences it. And that’s where the magic begins.
Next, let’s explore how to turn that understanding of light into the shadows that give your drawings depth and volume.
Mastering Shadows for Volume
Shadows are your secret weapon for turning flat drawings into living, breathing objects. They are not an afterthought — they are the structure that holds the illusion together.
Here’s how I use them:
-
Start with your light source. Every decision in your shading comes back to this. Imagine your drawing as a 3D model lit on a stage. If you move the spotlight, the whole look changes. Before you even begin, decide exactly where your light is coming from and stick to it. A clear light source means your shadows will always agree with each other, giving your drawing a solid, believable structure.
-
Soft vs. hard shadows. Curves, skin, and rounded objects thrive on soft transitions. Sharp edges, metal, and geometric forms benefit from crisp shadow lines. By varying the softness of your shadows within the same drawing, you create contrast not just in light and dark, but in texture and mood. This subtle shift will make your work more engaging to the viewer’s eye.
-
Distance matters. The closer a shadow is to the object casting it, the sharper and darker it will be. The further away it gets, the lighter and softer it becomes. Think of the shadow of your hand on a wall — hold your hand close, and the edges are sharp; move it away, and it blurs. Use this in your drawings to suggest space and depth.
-
Value contrast. Placing your darkest shadow right next to your brightest highlight creates instant impact. The human eye is naturally drawn to high-contrast areas first, so use this technique to control where your viewer looks. This is why portrait artists often place the brightest skin tones right against deep shadows — it makes the face “pop” off the page.
-
Cast shadows tell the story. A cast shadow is more than just a smudge under your subject — it tells the viewer about the surface, the distance, and the light angle. A long, stretched cast shadow can make an object look dramatic and moody; a short, tight one can make it feel grounded and stable. Play with length and direction to enhance your composition.
-
Blend for realism. Smooth transitions from light to dark create the illusion of roundness. Use blending stumps, tissues, or brushes to work the graphite into the paper. Remember, blending is not about making everything soft — it’s about making the transitions believable.
-
Consistency is king. Nothing breaks the illusion faster than inconsistent shadows. If the light is from the top left in one part of your drawing, but from the right in another, your viewer will sense something is “off” even if they can’t name it. Discipline here will make your drawings feel unified.
Soft vs. Hard Shadows
Before we dive into techniques, ask yourself: How do you want your viewer to feel? Do you want the scene to be gentle and calm? Or bold and dramatic? Are you after realism… or do you want to exaggerate the mood?
Soft and hard shadows are the tools you use to answer those questions.
Soft shadows are like whispered secrets — they transition gradually, suggesting gentleness, curves, and subtle depth. They’re common on cloudy days, in shaded rooms, or anywhere light is diffused. They make your work feel calm and natural.
Hard shadows are like bold statements — sharp, high-contrast, and unapologetic. They give your work edge, clarity, and structure. Strong sunlight or direct spotlights create them. They make your objects look solid and powerful, but they can also add tension or drama to a scene.
Great drawings use both — balancing softness and hardness so the viewer’s eye dances across the page without getting bored or lost.
Key Takeaways
-
Understand your light source. Your light source is the conductor of your drawing’s orchestra. It controls not just shadows, but mood, form, and focus. Spend time deciding exactly where it is before you start. Even in the most complex scenes, a consistent light source makes the entire piece feel harmonious and believable.
-
Use shadows to add volume. Shadows aren’t just darker patches — they are the curvature and structure of your objects. Without them, even the most perfectly drawn outline will feel flat. With them, you can make a sphere look like it could roll off the page. Always think of your shadows as sculpting the surface.
-
Soft vs. hard shadows. Mastery comes from knowing when to use each — and how to transition between them. Soft shadows build subtlety, hard shadows build structure. Combining the two adds layers of visual interest and keeps your viewer engaged.
-
Work with value contrast. Strong contrast is your “attention magnet.” It pulls the eye exactly where you want it. Experiment with placing your darkest darks next to your brightest highlights — and then watch your drawings suddenly have focal points that command attention.
-
Blend your shadows. Blending isn’t just about making things smooth — it’s about creating the illusion of smoothness where it’s needed, while preserving texture where you want it. The better your control over blending, the more convincing your surfaces will be.
Your Challenge + 3 Potent Pro Tips
Find a single object and shine a light on it. Study the shadows and highlights, then draw it three times: once using only soft shadows, once using only hard shadows, and once combining the two.
Pro Tip #1: Squint at your subject — this reduces detail and makes the big shapes of light and shadow easier to see.
Pro Tip #2: Use a white pencil or eraser to draw the light back in after shading. This makes highlights sharper and more vibrant.
Pro Tip #3: In your combined soft/hard shadow drawing, exaggerate the difference — make the soft areas really soft and the hard edges really crisp. This contrast will make your work sing.
Final Thoughts
Before we wrap up, I want to wish you the best of luck in your light and shadow journey. Once you start noticing light in the real world — in the folds of your bedsheets, in the curve of a coffee cup, in the clouds at sunset — you can’t unsee it.
Light and shadow are more than technical skills. They’re the emotion in your drawing, the invisible force that makes people stop and look closer. The more you train your eye to see them, the more your drawings will feel alive — and the more you’ll see the world itself in a richer, more detailed way.
So, grab your pencils, slow down, and let the light guide your hand. You’re not just drawing objects… you’re drawing the space, the atmosphere, and the story around them.
Happy drawing,
Luke Lewis
Artist & Art Teacher
Founder of Luke’s Fine Arts
www.lukesfinearts.com.au | 📞 0405 268 796
Instagram and Facebook: @lukesfinearts
